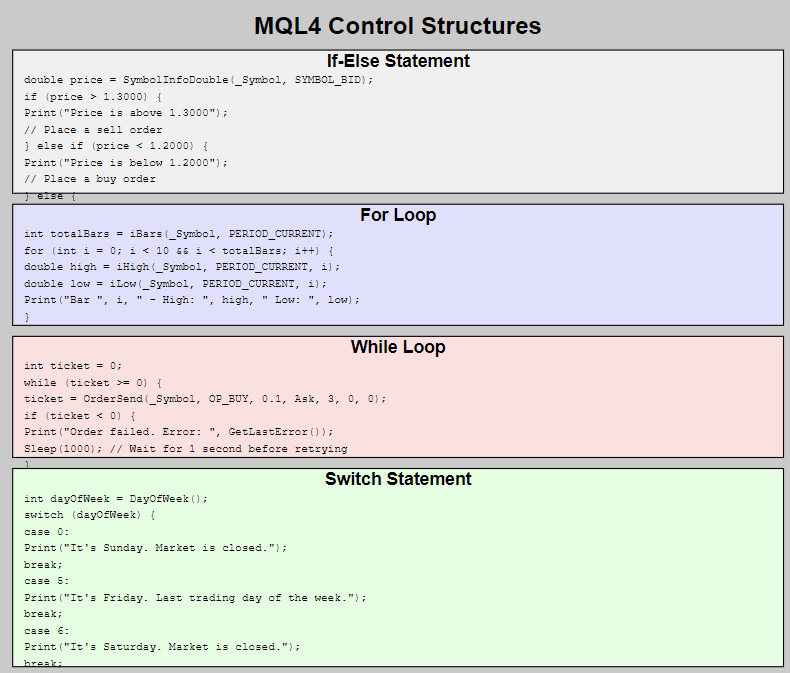
ตัวอย่างการใช้งานโครงสร้างควบคุม (if-else, loops, switch)
โครงสร้างควบคุมเป็นส่วนสำคัญในการเขียนโปรแกรม MQL4 ที่ช่วยให้เราสามารถควบคุมการทำงานของโปรแกรมได้อย่างมีประสิทธิภาพ

ลองมาดูตัวอย่างการใช้งานโครงสร้างควบคุมแบบต่างๆ กัน:
1. if-else statement
ใช้สำหรับตัดสินใจทำงานตามเงื่อนไขที่กำหนด
void CheckAndTrade()
{
   double currentPrice = MarketInfo(Symbol(), MODE_BID);
   double ma20 = iMA(Symbol(), 0, 20, 0, MODE_SMA, PRICE_CLOSE, 0);

   if(currentPrice > ma20) {
      Print("Price is above MA20. Considering a buy order.");
      // เพิ่มโค้ดสำหรับเปิดคำสั่งซื้อที่นี่
   }
   else if(currentPrice < ma20) {
      Print("Price is below MA20. Considering a sell order.");
      // เพิ่มโค้ดสำหรับเปิดคำสั่งขายที่นี่
   }
   else {
      Print("Price is equal to MA20. No action taken.");
   }
}
2. for loop
ใช้สำหรับทำงานซ้ำๆ ตามจำนวนรอบที่กำหนด
void CalculateAveragePrice()
{
   int periods = 10;
   double sum = 0;

   for(int i = 0; i < periods; i++) {
      double closePrice = iClose(Symbol(), 0, i);
      sum += closePrice;
      Print("Close price ", i, " periods ago: ", closePrice);
   }

   double average = sum / periods;
   Print("Average price over last ", periods, " periods: ", average);
}
3. while loop
ใช้สำหรับทำงานซ้ำๆ ตราบใดที่เงื่อนไขยังเป็นจริง
void CloseAllOrders()
{
   while(OrdersTotal() > 0) {
      for(int i = OrdersTotal() - 1; i >= 0; i--) {
         if(OrderSelect(i, SELECT_BY_POS, MODE_TRADES)) {
            bool result = OrderClose(OrderTicket(), OrderLots(),
                          MarketInfo(OrderSymbol(), MODE_BID), 3, clrRed);
            if(result) {
               Print("Order closed successfully: ", OrderTicket());
            }
            else {
               Print("Failed to close order: ", OrderTicket(),
                     ". Error: ", GetLastError());
            }
         }
      }
   }
   Print("All orders have been closed.");
}
4. do-while loop
คล้ายกับ while loop แต่จะทำงานอย่างน้อยหนึ่งครั้งก่อนตรวจสอบเงื่อนไข
void AdjustStopLoss()
{
   double newStopLoss;
   bool success;

   do {
      newStopLoss = NormalizeDouble(Bid - 20 * Point, Digits);
      success = OrderModify(OrderTicket(), OrderOpenPrice(), newStopLoss,
                OrderTakeProfit(), 0, clrGreen);

      if(!success) {
         Print("Failed to modify order. Error: ", GetLastError());
         Sleep(1000);  // รอ 1 วินาทีก่อนลองใหม่
      }
   } while(!success);

   Print("Stop loss adjusted successfully to ", newStopLoss);
}
5. switch statement
ใช้สำหรับเลือกทำงานตามค่าที่กำหนด
void HandleTradeSignal(int signal)
{
   switch(signal) {
      case 1:
         Print("Strong buy signal detected.");
         // เพิ่มโค้ดสำหรับเปิดคำสั่งซื้อที่นี่
         break;
      case -1:
         Print("Strong sell signal detected.");
         // เพิ่มโค้ดสำหรับเปิดคำสั่งขายที่นี่
         break;
      case 0:
         Print("Neutral signal. No action taken.");
         break;
      default:
         Print("Invalid signal received.");
   }
}
6. การใช้โครงสร้างควบคุมร่วมกัน
ต่อไปนี้เป็นตัวอย่างการใช้โครงสร้างควบคุมหลายแบบร่วมกันในสถานการณ์จริง:
void ManageOpenPositions()
{
   for(int i = OrdersTotal() - 1; i >= 0; i--) {
      if(OrderSelect(i, SELECT_BY_POS, MODE_TRADES)) {
         if(OrderType() <= OP_SELL) { // เช็คว่าเป็น market order double currentProfit = OrderProfit(); if(currentProfit > 0) {
               if(currentProfit >= OrderOpenPrice() * 0.01) {  // ถ้ากำไร 1% ขึ้นไป
                  bool result = OrderClose(OrderTicket(), OrderLots(),
                                MarketInfo(OrderSymbol(), MODE_BID), 3, clrGreen);
                  if(result) {
                     Print("Profit target reached. Order closed: ", OrderTicket());
                  }
                  else {
                     Print("Failed to close profitable order. Error: ", GetLastError());
                  }
               }
            }
            else if(currentProfit < 0) { if(MathAbs(currentProfit) >= OrderOpenPrice() * 0.02) {  // ถ้าขาดทุน 2% ขึ้นไป
                  bool result = OrderClose(OrderTicket(), OrderLots(),
                                MarketInfo(OrderSymbol(), MODE_BID), 3, clrRed);
                  if(result) {
                     Print("Stop loss reached. Order closed: ", OrderTicket());
                  }
                  else {
                     Print("Failed to close losing order. Error: ", GetLastError());
                  }
               }
            }
         }
      }
   }
}
ในตัวอย่างนี้ เราใช้ for loop เพื่อวนลูปผ่านทุกออเดอร์ที่เปิดอยู่ ใช้ if statements เพื่อตรวจสอบเงื่อนไขต่างๆ และตัดสินใจว่าจะจัดการกับแต่ละออเดอร์อย่างไร
การเข้าใจและใช้งานโครงสร้างควบคุมอย่างมีประสิทธิภาพจะช่วยให้คุณสามารถสร้าง EA ที่มีความซับซ้อนและยืดหยุ่นมากขึ้น สามารถจัดการกับสถานการณ์การเทรดที่หลากหลายได้

FOREXDUCK (นามปากกา) นักเขียนของเรามีประสบการณ์การเงินการลงทุนกว่า 10 ปี มีความเชี่ยวชาญในการวิเคราะห์ตลาด Forex และคริปโต โดยเฉพาะการวิเคราะห์ทางเทคนิค รวมถึงเทคนิคต่าง

